

Three.js is a popular JavaScript library that allows developers to create 3D animations and visualizations on the web. It is a powerful tool that can be used to create a wide range of interactive 3D experiences, including games.
Vite is a modern web development tool that allows developers to build fast and efficient applications using the latest JavaScript features. It is similar to popular tools like Create React App, but it is much faster and has a smaller footprint which is important when building 3D applications.
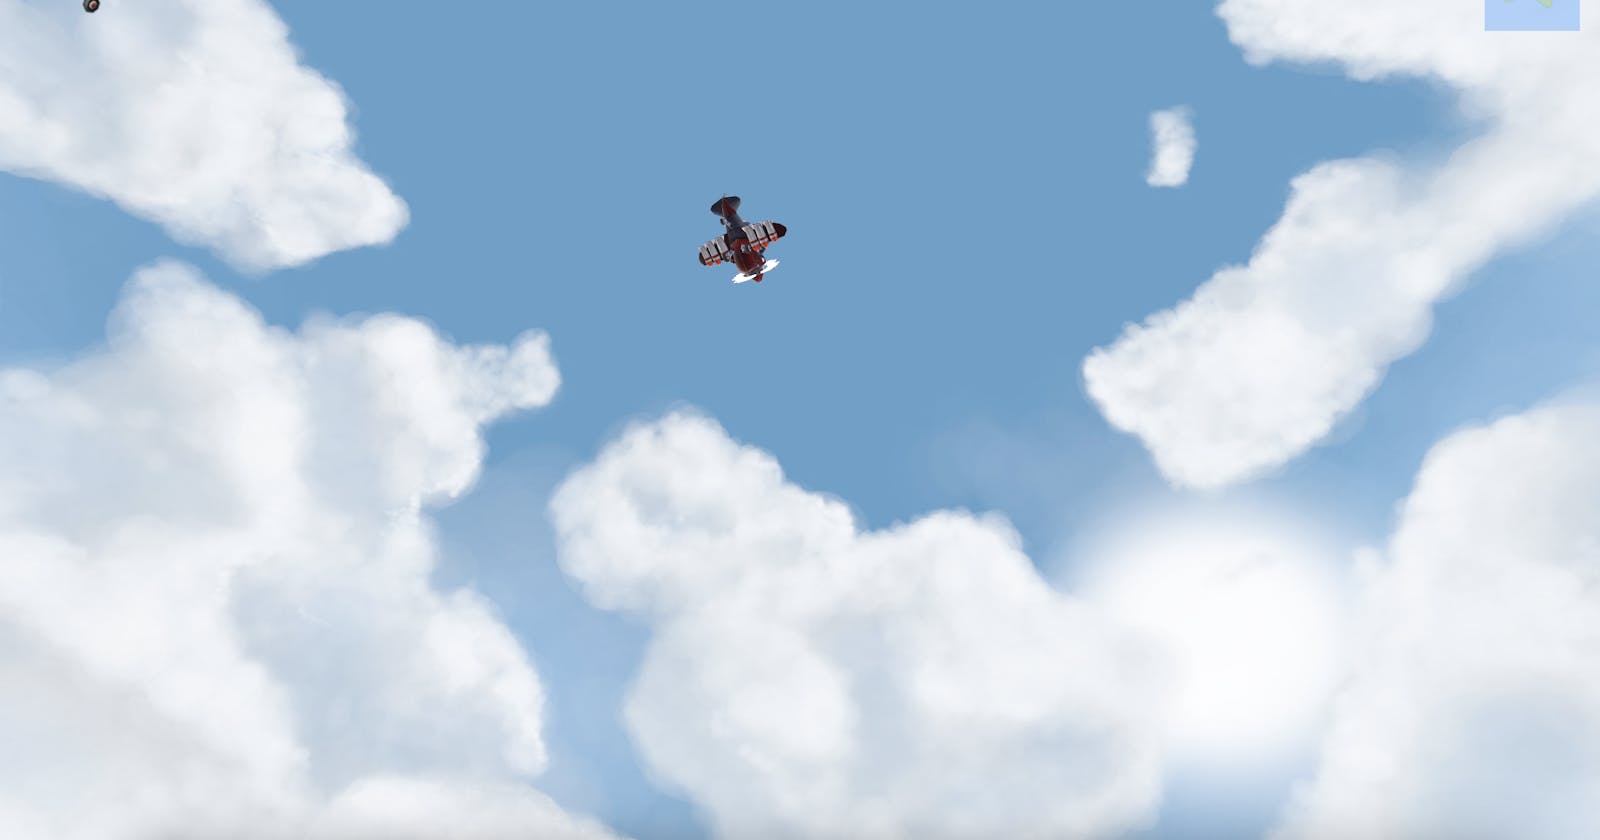
Vite is a modern web development tool that allows developers to build fast and efficient applications using the latest JavaScript features. It is similar to popular tools like Create React App, but it is much faster and has a smaller footprint. In this article, we will explore how to use Vite to build an airplane game that involves increasing and lowering altitude to avoid obstacles like bombs.
The first step in creating this game is to install Vite and create a new project. This can be done by running the following commands:
npm install -g create-vite-app
create-vite-app my-airplane-game
cd my-airplane-game
Once the project has been created, we can start importing the necessary dependencies. For this game, we will need three.js and gsap. GSAP, or the GreenSock Animation Platform, is a JavaScript library for creating high-performance, cross-platform animations and interactions. It is widely used in web and mobile applications, and is often used in conjunction with libraries like Three.js for creating complex, interactive 3D animations.
GSAP is known for its speed and flexibility, and offers a variety of tools and features for creating and controlling animations. These include tweening, which allows you to smoothly interpolate between two values over a given duration, and timelines, which allow you to orchestrate multiple animations and manage their timing and sequencing.
In a Three.js application, GSAP can be used to animate various aspects of the scene, such as the position, orientation, and appearance of 3D objects. This can be useful for creating realistic, dynamic effects, such as moving objects, changing lighting, or transitioning between different scenes.
To install these dependencies, we can run the following command:
npm install three
npm install gsap
Create a folder and include a file with this code for the game.
import * as THREE from 'three';
import { RGBELoader } from 'three/examples/jsm/loaders/RGBELoader';
import { Plane } from './Plane.js';
import { Obstacles } from './Obstacles.js';

class Game {
    constructor() {
        const container = document.createElement('div');
        document.body.appendChild(container);

        this.loadingBar = new LoadingBar();
        this.loadingBar.visible = false;

        this.clock = new THREE.Clock();

        this.assetsPath = '../../assets/';

        this.camera = new THREE.PerspectiveCamera(
            70,
            window.innerWidth / window.innerHeight,
            0.01,
            100
        );
        this.camera.position.set(-4.37, 0, -4.75);
        this.camera.lookAt(0, 0, 6);

        this.cameraController = new THREE.Object3D();
        this.cameraController.add(this.camera);
        this.cameraTarget = new THREE.Vector3(0, 0, 6);

        this.scene = new THREE.Scene();
        this.scene.add(this.cameraController);

        const ambient = new THREE.HemisphereLight(0xffffff, 0xbbbbff, 1);
        ambient.position.set(0.5, 1, 0.25);
        this.scene.add(ambient);

        this.renderer = new THREE.WebGLRenderer({
            antialias: true,
            alpha: true,
        });
        this.renderer.setPixelRatio(window.devicePixelRatio);
        this.renderer.setSize(window.innerWidth, window.innerHeight);
        this.renderer.outputEncoding = THREE.sRGBEncoding;
        container.appendChild(this.renderer.domElement);
        this.setEnvironment();

        this.active = false;
        this.load();

        window.addEventListener('resize', this.resize.bind(this));

        document.addEventListener('keydown', this.keyDown.bind(this));
        document.addEventListener('keyup', this.keyUp.bind(this));

        document.addEventListener('touchstart', this.mouseDown.bind(this));
        document.addEventListener('touchend', this.mouseUp.bind(this));
        document.addEventListener('mousedown', this.mouseDown.bind(this));
        document.addEventListener('mouseup', this.mouseUp.bind(this));

        this.spaceKey = false;

        const btn = document.getElementById('playBtn');
        btn.addEventListener('click', this.startGame.bind(this));
    }

    startGame() {
        const gameover = document.getElementById('gameover');
        const instructions = document.getElementById('instructions');
        const btn = document.getElementById('playBtn');

        gameover.style.display = 'none';
        instructions.style.display = 'none';
        btn.style.display = 'none';

        this.score = 0;
        this.bonusScore = 0;
        this.lives = 3;

        let elm = document.getElementById('score');
        elm.innerHTML = this.score;

        elm = document.getElementById('lives');
        elm.innerHTML = this.lives;

        this.plane.reset();
        this.obstacles.reset();

        this.active = true;

        this.sfx.play('engine');
    }

    resize() {
        this.camera.aspect = window.innerWidth / window.innerHeight;
        this.camera.updateProjectionMatrix();
        this.renderer.setSize(window.innerWidth, window.innerHeight);
    }

    keyDown(evt) {
        switch (evt.keyCode) {
            case 32:
                this.spaceKey = true;
                break;
        }
    }

    keyUp(evt) {
        switch (evt.keyCode) {
            case 32:
                this.spaceKey = false;
                break;
        }
    }

    mouseDown(evt) {
        this.spaceKey = true;
    }

    mouseUp(evt) {
        this.spaceKey = false;
    }

    setEnvironment() {
        const loader = new RGBELoader()
            .setDataType(THREE.UnsignedByteType)
            .setPath(this.assetsPath);
        const pmremGenerator = new THREE.PMREMGenerator(this.renderer);
        pmremGenerator.compileEquirectangularShader();

        const self = this;

        loader.load(
            'hdr/venice_sunset_1k.hdr',
            (texture) => {
                const envMap =
                    pmremGenerator.fromEquirectangular(texture).texture;
                pmremGenerator.dispose();

                self.scene.environment = envMap;
            },
            undefined,
            (err) => {
                console.error(err.message);
            }
        );
    }

    load() {
        this.loadSkybox();
        this.loading = true;
        this.loadingBar.visible = true;

        this.plane = new Plane(this);
        this.obstacles = new Obstacles(this);

        this.loadSGX();
    }

    loadSGX() {
        this.sfx = new SFX(this.camera, this.assetsPath + 'plane/');
        this.sfx.load('explosion');
        this.sfx.load('engine', true, 1);
        this.sfx.load('gliss');
        this.sfx.load('gameover');
        this.sfx.load('bonus');
    }

    loadSkybox() {
        this.scene.background = new THREE.CubeTextureLoader()
            .setPath(`${this.assetsPath}/plane/paintedsky/`)
            .load(
                ['px.jpg', 'nx.jpg', 'py.jpg', 'ny.jpg', 'pz.jpg', 'nz.jpg'],
                () => {
                    this.renderer.setAnimationLoop(this.render.bind(this));
                }
            );
    }

    gameOver() {
        this.active = false;

        const gameover = document.getElementById('gameover');
        const btn = document.getElementById('playBtn');

        gameover.style.display = 'block';
        btn.style.display = 'block';

        this.plane.visible = false;

        this.sfx.stopAll();
        this.sfx.play('gameover');
    }

    incScore() {
        this.score++;

        const elm = document.getElementById('score');

        if (this.score % 3 === 0) {
            this.bonusScore += 3;
            this.sfx.play('bonus');
        }

        this.sfx.play('gliss');
        elm.innerHTML = this.score + this.bonusScore;
    }

    decLives() {
        this.lives--;

        const elm = document.getElementById('lives');

        elm.innerHTML = this.lives;

        if (this.lives == 0) setTimeout(this.gameOver.bind(this), 1200);

        this.sfx.play('explosion');
    }

    updateCamera() {
        this.cameraController.position.copy(this.plane.position);
        this.cameraController.position.y = 0;
        this.cameraTarget.copy(this.plane.position);
        this.cameraTarget.z += 6;
        this.camera.lookAt(this.cameraTarget);
    }

    render() {
        if (this.loading) {
            if (this.plane.ready && this.obstacles.ready) {
                this.loading = false;
                this.loadingBar.visible = false;
            } else {
                return;
            }
        }

        const dt = this.clock.getDelta();
        const time = this.clock.getElapsedTime();

        this.plane.update(time);

        if (this.active) {
            this.obstacles.update(this.plane.position, dt);
        }

        this.updateCamera();

        this.renderer.render(this.scene, this.camera);
    }
}

export { Game }
In this code, the Game class is the main class that manages the game. It contains methods for setting up the scene, loading assets, and updating and rendering the game. The Plane and Obstacles classes are used to manage the airplane and obstacles, respectively. The SFX class is used to play sound effects in the game.
The constructor() method is where the basic structure of the game is set up. This includes creating the scene, camera, renderer, and adding them to the page. It also sets up event listeners for keyboard and mouse input, and creates instances of the Plane, Obstacles, and SFX classes.
The startGame() method is called when the user clicks the "Play" button to start the game. It hides the gameover and instructions screens, and resets the score, lives, and game objects.
The resize() method is called when the window is resized, and it updates the camera's aspect ratio and the renderer's size.
The keyDown() and keyUp() methods are called when a keyboard key is pressed or released, respectively. They are used to track the state of the space key, which is used to control the airplane's altitude in the game.
The mouseDown() and mouseUp() methods are called when the mouse is clicked or released, respectively. They are used to track the state of the mouse button, which is also used to control the airplane's altitude in the game.
The update() method is called every frame, and it is used to update the game's state. This includes updating the position and rotation of the airplane and obstacles, checking for collisions, and updating the score and lives.
The render() method is called every frame, and it is used to render the scene. This includes rendering the sky, airplane, and obstacles using the three.js renderer.
You would get an error because you haven't created the Plane, so create a Plane.js file and include the following:
import { Vector3 } from 'three';
import { GLTFLoader } from 'three/examples/jsm/loaders/GLTFLoader';

class Plane {
    constructor(game) {
        this.assetsPath = game.assetsPath;
        this.loadingBar = game.loadingBar;
        this.game = game;
        this.scene = game.scene;
        this.load();
        this.tmpPos = new Vector3();
    }

    get position() {
        if (this.plane !== undefined) this.plane.getWorldPosition(this.tmpPos);
        return this.tmpPos;
    }

    set visible(mode) {
        this.plane.visible = mode;
    }

    load() {
        const loader = new GLTFLoader().setPath(`${this.assetsPath}plane/`);
        this.ready = false;

        // Load a glTF resource
        loader.load(
            // resource URL
            'microplane.glb',
            // called when the resource is loaded
            (gltf) => {
                this.scene.add(gltf.scene);
                this.plane = gltf.scene;
                this.velocity = new Vector3(0, 0, 0.1);

                this.propeller = this.plane.getObjectByName('propeller');

                this.ready = true;
            },
            // called while loading is progressing
            (xhr) => {
                this.loadingBar.update('plane', xhr.loaded, xhr.total);
            },
            // called when loading has errors
            (err) => {
                console.error(err);
            }
        );
    }

    reset() {
        this.plane.position.set(0, 0, 0);
        this.plane.visible = true;
        this.velocity.set(0, 0, 0.1);
    }

    update(time) {
        if (this.propeller !== undefined) this.propeller.rotateZ(1);

        if (this.game.active) {
            if (!this.game.spaceKey) {
                this.velocity.y -= 0.001;
            } else {
                this.velocity.y += 0.001;
            }
            this.velocity.z += 0.0001;
            this.plane.rotation.set(0, 0, Math.sin(time * 3) * 0.2, 'XYZ');
            this.plane.translateZ(this.velocity.z);
            this.plane.translateY(this.velocity.y);
        } else {
            this.plane.rotation.set(0, 0, Math.sin(time * 3) * 0.2, 'XYZ');
            this.plane.position.y = Math.cos(time) * 1.5;
        }
    }
}

export { Plane };
This code defines a Plane class, which represents a 3D airplane model that can be added to a Three.js scene. The class has several methods and properties for loading, displaying, and updating the airplane in the scene.
The constructor method initializes the class and sets up the airplane's scene, game, and loading bar. The load method uses a GLTFLoader to load the airplane model from a file, and adds it to the scene when it is ready. The reset method resets the airplane's position and visibility, and the update method updates the airplane's position and orientation in the scene each frame. The position property returns the airplane's current position in the scene, and the visible property sets the airplane's visibility.
Overall, this code provides a basic framework for managing and displaying the 3D airplane model in our application.
Create an Obstacles.js file and add:
import { Group, Vector3 } from 'three';
import { GLTFLoader } from 'three/examples/jsm/loaders/GLTFLoader';
import { Explosion } from './Explosion.js';

class Obstacles {
    constructor(game) {
        this.assetsPath = game.assetsPath;
        this.loadingBar = game.loadingBar;
        this.game = game;
        this.scene = game.scene;
        this.loadStar();
        this.loadBomb();
        this.tmpPos = new Vector3();
        this.explosions = [];
    }

    loadStar() {
        const loader = new GLTFLoader().setPath(`${this.assetsPath}plane/`);
        this.ready = false;

        // Load a glTF resource
        loader.load(
            // resource URL
            'star.glb',
            // called when the resource is loaded
            (gltf) => {
                this.star = gltf.scene.children[0];

                this.star.name = 'star';

                if (this.bomb !== undefined) this.initialize();
            },
            // called while loading is progressing
            (xhr) => {
                this.loadingBar.update('star', xhr.loaded, xhr.total);
            },
            // called when loading has errors
            (err) => {
                console.error(err);
            }
        );
    }

    loadBomb() {
        const loader = new GLTFLoader().setPath(`${this.assetsPath}plane/`);

        // Load a glTF resource
        loader.load(
            // resource URL
            'bomb.glb',
            // called when the resource is loaded
            (gltf) => {
                this.bomb = gltf.scene.children[0];

                if (this.star !== undefined) this.initialize();
            },
            // called while loading is progressing
            (xhr) => {
                this.loadingBar.update('bomb', xhr.loaded, xhr.total);
            },
            // called when loading has errors
            (err) => {
                console.error(err);
            }
        );
    }

    initialize() {
        this.obstacles = [];

        const obstacle = new Group();

        obstacle.add(this.star);

        this.bomb.rotation.x = -Math.PI * 0.5;
        this.bomb.position.y = 7.5;
        obstacle.add(this.bomb);

        let rotate = true;

        for (let y = 5; y > -8; y -= 2.5) {
            rotate = !rotate;
            if (y == 0) continue;
            const bomb = this.bomb.clone();
            bomb.rotation.x = rotate ? -Math.PI * 0.5 : 0;
            bomb.position.y = y;
            obstacle.add(bomb);
        }
        this.obstacles.push(obstacle);

        this.scene.add(obstacle);

        for (let i = 0; i < 3; i++) {
            const obstacle1 = obstacle.clone();

            this.scene.add(obstacle1);
            this.obstacles.push(obstacle1);
        }

        this.reset();

        this.ready = true;
    }

    removeExplosion(explosion) {
        const index = this.explosions.indexOf(explosion);
        if (index != -1) this.explosions.indexOf(index, 1);
    }

    reset() {
        this.obstacleSpawn = { pos: 20, offset: 5 };
        this.obstacles.forEach((obstacle) => this.respawnObstacle(obstacle));
        let count;
        while (this.explosions.length > 0 && count < 100) {
            this.explosions[0].onComplete();
            count++;
        }
    }

    respawnObstacle(obstacle) {
        this.obstacleSpawn.pos += 30;
        const offset = (Math.random() * 2 - 1) * this.obstacleSpawn.offset;
        this.obstacleSpawn.offset += 0.2;
        obstacle.position.set(0, offset, this.obstacleSpawn.pos);
        obstacle.children[0].rotation.y = Math.random() * Math.PI * 2;
        obstacle.userData.hit = false;
        obstacle.children.forEach((child) => {
            child.visible = true;
        });
    }

    update(pos, time) {
        let collisionObstacle;

        this.obstacles.forEach((obstacle) => {
            obstacle.children[0].rotateY(0.01);
            const relativePosZ = obstacle.position.z - pos.z;
            if (Math.abs(relativePosZ) < 2) {
                collisionObstacle = obstacle;
            }
            if (relativePosZ < -20) {
                this.respawnObstacle(obstacle);
            }
        });

        if (collisionObstacle !== undefined) {
            let minDist = Infinity;
            collisionObstacle.children.some((child) => {
                child.getWorldPosition(this.tmpPos);
                const dist = this.tmpPos.distanceToSquared(pos);
                if (dist < minDist) minDist = dist;
                if (dist < 5 && !collisionObstacle.userData.hit) {
                    collisionObstacle.userData.hit = true;
                    console.log(`Closest obstacle is ${minDist.toFixed(2)}`);
                    this.hit(child);
                    return true;
                }
            });
        }

        this.explosions.forEach((explosion) => {
            explosion.update(time);
        });
    }

    hit(obj) {
        if (obj.name == 'star') {
            obj.visible = false;
            this.game.incScore();
        } else {
            this.explosions.push(new Explosion(obj, this));
            this.game.decLives();
        }
    }
}

export { Obstacles };
The Obstacles class is responsible for managing the obstacles (bombs) in the game. It includes methods for loading the bomb model using the three.js GLTFLoader, initializing the obstacles, resetting them when the game restarts, and updating their positions and checking for collisions with the airplane.
The constructor() method takes the Game class as an argument, and uses it to access the assets path, loading bar, and scene. It then calls the loadStar() and loadBomb() methods to load the models for the star and bomb obstacles.
The loadStar() and loadBomb() methods use the GLTFLoader to load the star and bomb models, respectively. When both models have been loaded, the initialize() method is called to set up the obstacles.
The initialize() method creates three groups of obstacles, each consisting of a star and several bombs. It adds these groups to the scene and positions them along the x-axis.
The reset() method is called when the game restarts, and it resets the position and offset of the obstacles, as well as removing any active explosions.
The respawnObstacle() method is called when an obstacle goes off the screen to the left, and it repositions the obstacle to the right of the screen at a random y-coordinate.
The update() method is called every frame, and it is used to update the position of the obstacles and check for collisions with the airplane. If a collision is detected, an explosion effect is created using the Explosion class.
Overall, the Obstacles class provides a way to manage the obstacles in the game and handle their movement and collisions.
You also need an interface for users to interact with, so create an index.html for that:
<!DOCTYPE html>
<html lang="en">
    <head>
        <meta charset="UTF-8" />
        <link rel="icon" type="image/svg+xml" href="/assets/favicon.svg" />
        <meta name="viewport" content="width=device-width, initial-scale=1.0" />

        <link rel="preconnect" href="https://fonts.gstatic.com" />
        <link rel="icon" type="image/x-icon" href="../../favicon.svg">


        <title>Flight simulator</title>
    </head>

    <body>
        <p id="instructions">
            Fly your crew to safety! <br />
        </p>
        <div id="info">
            <div id="life">
                <img src="image.png" />
                <div id="lives">3</div>
            </div>
            <div id="score-panel">
                <div id="score">0</div>
                <img src="score.png" />
            </div>
        </div>
        <p id="gameover">Over</p>
        <button id="playBtn">Start</button>
        <script type="module">
            import { Game } from './Game.js';

            document.addEventListener('DOMContentLoaded', () => {
                const game = new Game();
                window.game = game;
            });
        </script>
    </body>
</html>
Ensure your model is properly imported and your Vite config files are properly set up.
Run your project, and there you have it!